Thursday, September 29, 2011

DIY Family Monogram Plate

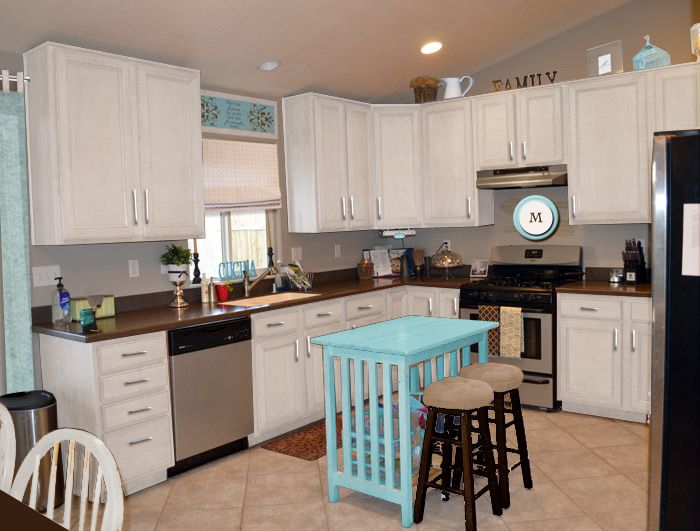
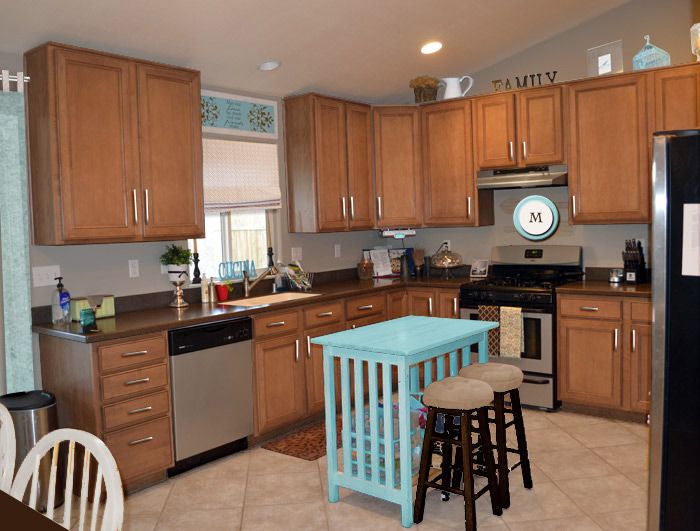
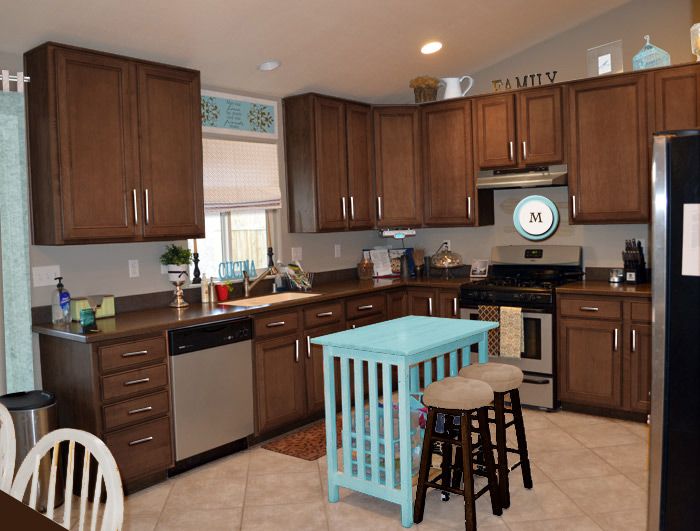
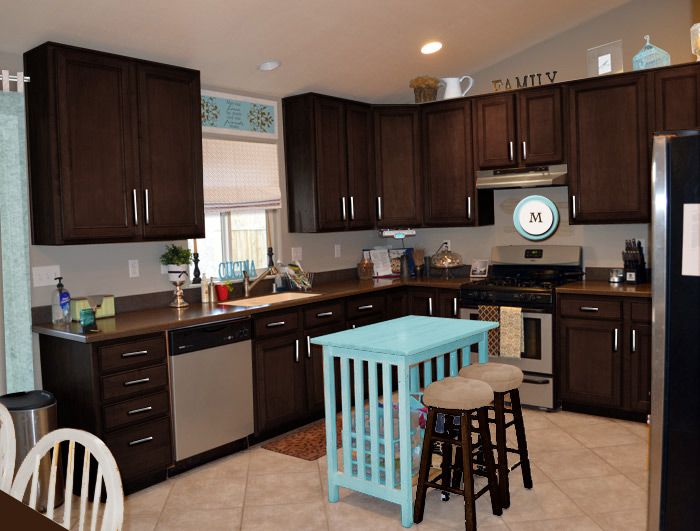
So it has been a little while since my last post. I have been busy. However, I for sure will not let go of this project and I am back! So in my last post I asked you about color you think I should paint/stain my cabinets in my kitchen. Most of you chosen Espresso and I think it is a good option. So if you looked at the photoshopped picture oh my potential kitchen that I posted, you were probably thinking, "what in the world is that on the wall over the range?!"

Well that is what I intend to show you today. :) I made a craft to go over my range on the wall (I don't have a backsplash - I want to find a nice inexpensive and creative way to have one) that is a focal point in my kitchen. I cannot yet disclose how it looks in the kitchen as I have not done the reveal of the kitchen yet (not ready for it yet). But I do want to show you how awesome it itself looks and how you can do it. OK so this is what I did and how it actually looks like in the real non-photoshopped life...


So how do you make something like this? I call this a Family Monogram Plate. Here's how I did it.

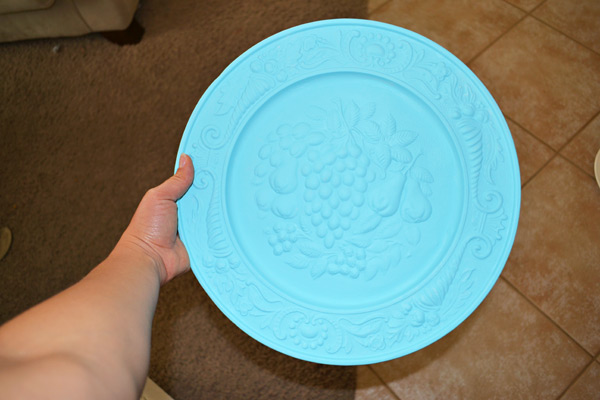
I went to the thrift store (I LOVE thrift stores!) and got these two plates. One is like a platter, metal-ish, and very ugly. The only thing that I liked about it was the border and the size. I saw great potential in this. The white plate I loved. It was white, oversized, and I loved the border as well (and I only had to buy 1 - except that I went back the next day and bought a couple more like it for some other crafts I have planned).

I primed the gold platter (see that it already had the nice little hook ring there ready to hang so it was perfect, I didn't have to install that myself...

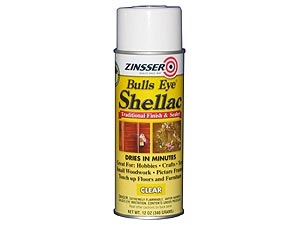
Then I painted it (my paint is a flat finish paint because I wanted it to look like wall paper on the wall, so for this project, I used shellac after I painted it and it was dry so that it could have a nice subtle gloss and so that it can be easy to clean (gotta love that!).


Then I used my handy dandy glue E6000 glue that I got from the local True Value Hardware:
and put it on BOTH surfaces since neither one of them is porous. 


And then had it dry for about 3 days (in which you do NOT want to touch it because it can come apart, yes, it does take that long for that much glue to harden completely, but when it hardens, it HARDENS!). And yes, it did happen to me, I was too curious and I had to go through the glueing process a second time, so learn from my experience. :)

Then after then were stacked and the glue was dry, I placed a vinyl monogram I ordered through Etsy (because of the size it was very inexpensive) and I placed it on there as soon as I received it. If you have a local friend that can do this for you, then that would be great because you wouldn't have to wait as long to get it and it might be cheaper. :)


And voila! Our plate is finished and I get so many compliments by people who come into my kitchen and see it. The M is the first letter in our last name so it is very well-suited and customized for our family (love that!). That's the beauty of making your own crafts - cheap, stylish, custom!

Have fun making yours if you want to endeavor making one - super easy!! Hugs!

Tuesday, September 13, 2011

Kitchen Cabinets Poll - Please Vote on the right ---->

Aahhhh, the power of Photoshop... I can see the possibilities with my kitchen cupboards right before my eyes. Here's what my kitchen cabinets look like (they're actually a bit darker than the picture but still orange-ish... I can't believe I chose that...pointing finger in my mouth):


Here are the options that I chose in Photoshop: 
Here are some more altered images I did playing in Photoshop:

White:


Now:


Medium/Dark Brown:


Espresso:
Will you please take a moment and decide which color/stain I should choose? It would help me out tons. Thanks so much!! :)

Tackle the Kitchen - Part II

So I am getting kind of desperate to be honest. I, like, want to be done with my kitchen NOW... but I have to remember that good things come to those who wait. :) Alrighty, I am moving forward with my kitchen and I have added a few more touches, again, just a few. First, remember how my kitchen didn't have anything on top of the cupboards?


I wasn't sure if I wanted to add stuff on top or not because I wanted to go with a more modern feel and I was afraid that with adding stuff there it would get it all crowded and too traditional and I just did not know what to do. Well, to end my dilemma I decided that I should at least give it a try, put some things there just to see how I like them and if I don't like them then I can always take them down. So here's what I quickly put up there:

(you know what, the more I look at these pictures the more I want my cupboards to be a different color... and the more I look at that range hood the more I want it out...)

OK so I looked at that and I thought, "I kind of like it, but I definitely don't love it. The colors are all wrong and the placement has to change. Not sure about this." So I moved some things around, painted a few things, and this is what I came up with now (the current state of what the top of my cupboards is like):


OK from left to right, the twigs pot I already had, it was on the counter in the kitchen so I just moved it up. The white pitcher is a thrift store find which was actually a light sage but I spray painted it (still needs  a glossy lacquer finish, will get to it). The Family word art I had on a shelf in the living room. The stainless steel frame I already had, I just added a picture of a little turquoise birdie that I printed myself (the image is a commercial use item). The bird cage was given to me by my sister-in-law, she was about to take it to the thrift store but I gladly took it off her hands. :) It was a rusted or worn green before. I cleaned it, primed it, painted it turquoise. And those 3 hurricanes I actually made myself! :) I love how they turned out! Here's a closer look at what they look like:

(and that's looking at them from the floor up, you can't really see the bottom part of these babies from down here) I filled these with things I already had around the house.

OK so what do you think of my newest little project? Is it a keeper? Or should I take everything down? I have to say that I do like how it looks but let me know your thoughts or suggestions! :)

Now I am going to show you how I made these. This idea is actually taken from an idea shared on Pinterest of DIY hurricanes. I just thought I HAD to try it myself. 

OK, first I went to the thrift store and bought a few items that I stacked up there to see if they would work together and from what I could gather, they looked good. These are the different pieces I got from the thrift store except for one of them which I already owned, was from Tarjay (Target). :)


I then washed them all and they looked so sparkly clean afterwards!


Now it was time to assemble!

Using E6000 Glue, a multi-purpose adhesive with industrial strength which I got from True Value Hardware Store

I put glue on BOTH surfaces that I will be glueing together. I let them stand for about 5 minutes unattached still.


Then I went ahead and put both pieces together in standing position and pressed gently. I did this with each piece that I wanted stacked and glued until the whole hurricane is done. If you get any glue that comes out you can use acetone BEFORE it is cured and remove it.


I just kept stacking and glueing until I got these!


And there you have it! I am working on some other touches to add to my kitchen and to show you. Hope you come back soon and please let me know what you think! Thanks! :)

Sunday, September 11, 2011

Project 1: Tackle the Kitchen

What started it? How come I decided to do this? Recently I went to visit my sister who lives in Utah and I was amazed when I walked into her house at how beautiful her house is! My sister is a great decorator and a savvy shopper too. She's not one to get stuff at expensive prices, which I love that, because when you go into her house you can swear that she bought all of her stuff from expensive stores, but nope, one of her best friends is the good ol' thrift store (I love thrift stores!). She told me about how much she loves her house because it is "her." Her style defines her space and when I returned home, I wanted to feel the same thing and the same way about my house. So here I go!

My color scheme for my main living area. This color scheme is pretty neutral and can be paired with other colors if I feel like changing things up. Plus light turquoise is my thing. :)


Alrighty, I decided to start with my kitchen because it is the area where I spend a lot of time doing things for my family and I just have a really hard time doing things like cooking and what not in my kitchen when I look at how boring it is. I don't know about other people's kitchens, but in my case, I just think mine is. OK, this is what my kitchen looks like. It's not bad, and believe me I do appreciate the little things, another thing that my sister helped me to recognize more in my life (you know, one of those lessons that you already know but need a nice reminder of every once in a while). It just needs some things to make it look better and to have a color scheme for goodness' sake! Haha! Oh and yes, I SEE all  the fingerprints everywhere and the huge mess on the fridge. I have four little ones and they sure keep me busy and many times I have a hard time keeping up with their messes. But, part of this sprucing up things around my house is also to do real thorough cleaning more often. No, I am not perfect.


OK, see what I mean?! Ugh. Well, now after adding a FEW little touches, and trust me this is just a few minor touches but that I think do make a difference even if it is a small difference. And remember that this is only the beginning of making my kitchen "me."

In here I added a decorative sign over my kitchen window that I made. I already had the wood panel so all I did was spray paint it white, taped off the edges about 2 inches from the edge towards the center, painted the middle a turquoise (part of my color scheme), and then added the decal from Better Homes & Garden available at Target and other such stores. I think Walmart has them as well. This one in particular was given to me by my sister-in-law for my birthday (yep, she knows I love decorating). I also added a small kitchen rug in a modern floral pattern in brown (part of my color scheme). It might be helpful to know that I took these pictures when it was getting dark outside so that's why they don't look very bright, but I really wanted to get started and for now this is what I have. The next few ones will be in the daytime. :) Oh, and I totally know about the difference in wood tones of my cabinets and table and island (I've got plans, bwahahahaha!). Let me tell you, that table is not my style at all but it has served our family for many years, especially when we were not able to afford to buy a table ourselves, yes, it was given to us. :) But we ARE planning on replacing this dining set soon and I can't wait to show you what we have chosen to replace it with. I also added the potted plant on the chrome candle holder and it looks totally fab, one of my favorite things in the room for sure. It also has a brown ribbon around it which is a nice touch. I also added some wooden word art on the window sill painted in turquoise. I also added some pine needles (yes, pine needles) in a pewter vase by my recipe book along with some other pewter decorative items so that it overall looks like a small collection. Because remember, if it's two of something, then it's just a pair. If it's three or more then it's a collection. That my friends I learned from HGTV (love that channel!) hehe.

Here's a closeup of the sign I made and hung over my kitchen window.

Here I added a tri-folded table cloth (folded into 3 or triple fold) to make it look like a table runner UNTIL I actually make my new table runner. I already have the fabric for it and all and it will look amazing on my new dining set that we will be getting. See those silver candlesticks there? I added those and those were an amazing find at the thrift store. Now I just need to go and get some nice candles to put in them. Oh, notice the turquoise in the pictures? That is actually wrapping paper with a really nice modern pattern that I found at Target and I fell in love with it. I thought it was perfect for my frames. Yay for that! The leather tray I got from Costco a while back. The platter with the gorgeous damask pattern was a gift from a local shoppe in town. And under that platter is a placemat that I got from the thrift store a while back but I hear that Ikea has some really similar ones. Put it all together - my centerpiece! :)

OK, like I said these are just some small changes but with a little at a time, it will all look fabulous in the end. You shall see... :)

Saturday, September 10, 2011

Why this blog

Hello world! Here's my attempt at creating a beautiful space in my home. I live in the desert part of Southern California and I like it here, but I want to love my surroundings more. I want to fall in love with everything in my house and this is my attempt at doing that. I am going to start with a space at a time, a craft at a time, until the entire house looks like I want it to and gives me that feeling of "me" that I am looking for. It will be a lot of work, but I am thrilled and so excited to start this journey. As I do, I will show you everything that I do and I hope that you will walk through this journey with me as you visit often and leave me your comments or suggestions or if you have any questions. I am also happy to answer any design questions you may have. I am not an interior designer but I have good taste and love everything that is pleasing to the eye and inspirational. So be sure to come often and to bookmark my blog because lots of gorgeousness is coming your way. I know that I just started this blog but I have to start somewhere, right? I am confident that you will like what you see here and that many of you will feel inspired by what you will find here.

Want to do this challenge with me? 
I TOTALLY invite you to do that! Let's do it together! Let me know the link to your blog where you will share your pictures, tutorials and what not and I will include it on my list so that others can be inspired by you. So go on, give it a try, and let's make our spaces pretty. :)